Use case
How to make online course videos students actually finish
Updated
In short
A good online course video covers one learning objective, rarely runs longer than 6 minutes, and shows the action up close. Split your course into short lessons, work from a bullet outline instead of a word-for-word script, record your screen and voice in one take, then let Clarcut add the zooms, cut the silences and clean up the audio. Export an MP4 and upload each lesson to your course platform.
What makes a good course video
The go-to research here is still the 2014 study by Philip Guo, Juho Kim and Rob Rubin, who analyzed 6.9 million viewing sessions on edX. Their findings hold up: shorter videos are far more engaging, engagement drops sharply past roughly the 6-minute mark, an informal style that shows the instructor’s face at the right moments beats narrated slides, and a classroom lecture recorded as-is doesn’t translate well online. The instructor’s speaking pace and enthusiasm matter too.
In practice, a strong lesson checks these boxes:
- One objective, stated in the first 15 seconds: “By the end of this video, you’ll be able to build a pivot table.”
- The finished result shown before the walkthrough, so students know where they’re headed.
- An interface that’s readable on a laptop or phone, with buttons and text enlarged at the right moments.
- Clean audio, with no keyboard clatter or fan hum.
- A human presence in the right dose: your camera up front and at the end, smaller during the demo.
A lesson template that works
- 1
Hook and objective (10–20 sec)
Say what students will be able to do and why it matters. Skip the long intro and your life story.
- 2
The end result (10 sec)
Show the finished screen: the spreadsheet, the setting, the exported file. Students instantly see the destination.
- 3
The walkthrough, in 3 to 5 steps
One step per meaningful action. Name what you click (“I’ll click Insert, then Table”) and pause briefly after each click.
- 4
The common mistake
Show the trap your students fall into most often and how to get out of it. It’s often the most valuable part of the lesson.
- 5
Recap and exercise
Sum up the steps in one sentence and give a quick exercise to do right away, or point to the next lesson.
Plan your course videos
| Video type | Suggested length | Format | Where to publish |
|---|---|---|---|
| Course trailer | 1–2 min | 16:9 | Sales page, YouTube |
| Hands-on lesson | 2–6 min | 16:9 | Course platform |
| Workshop or case study | 10–20 min, split into parts | 16:9 | Course platform, share link with transcript |
| Exercise walkthrough | 3–8 min | 16:9 | Course platform, below the exercise |
| Lesson update | 1–3 min | 16:9 | Course platform, email to students |
| Promo clip | 30–60 sec | 9:16 or 4:5 | Reels, Shorts, TikTok, LinkedIn |
A 15-minute lesson can almost always become three 5-minute videos. Students get natural checkpoints, and when the software’s interface changes, you only re-record one short video.
Prepping and recording a lesson
- Write a bullet outline, not a script. Reading aloud is obvious to viewers and kills the natural tone.
- Use a demo account or sample file with realistic data and no personal information.
- Scale up the display (125–150% on Windows, or browser zoom). A tiny interface stays hard to read even when zoomed.
- Turn off notifications, close extra tabs and tidy your desktop.
- Keep your mic about a hand’s width from your mouth. A decent headset mic beats a great mic sitting across the desk.
- Record one lesson per file. On Windows, Ctrl + Shift + R starts and stops recording, and the optional 3-second countdown gives you time to settle in.
- Flub a line? Pause, then start the sentence over. The pause gets cut automatically, and you can delete the bad take with the S key.
What Clarcut edits for you
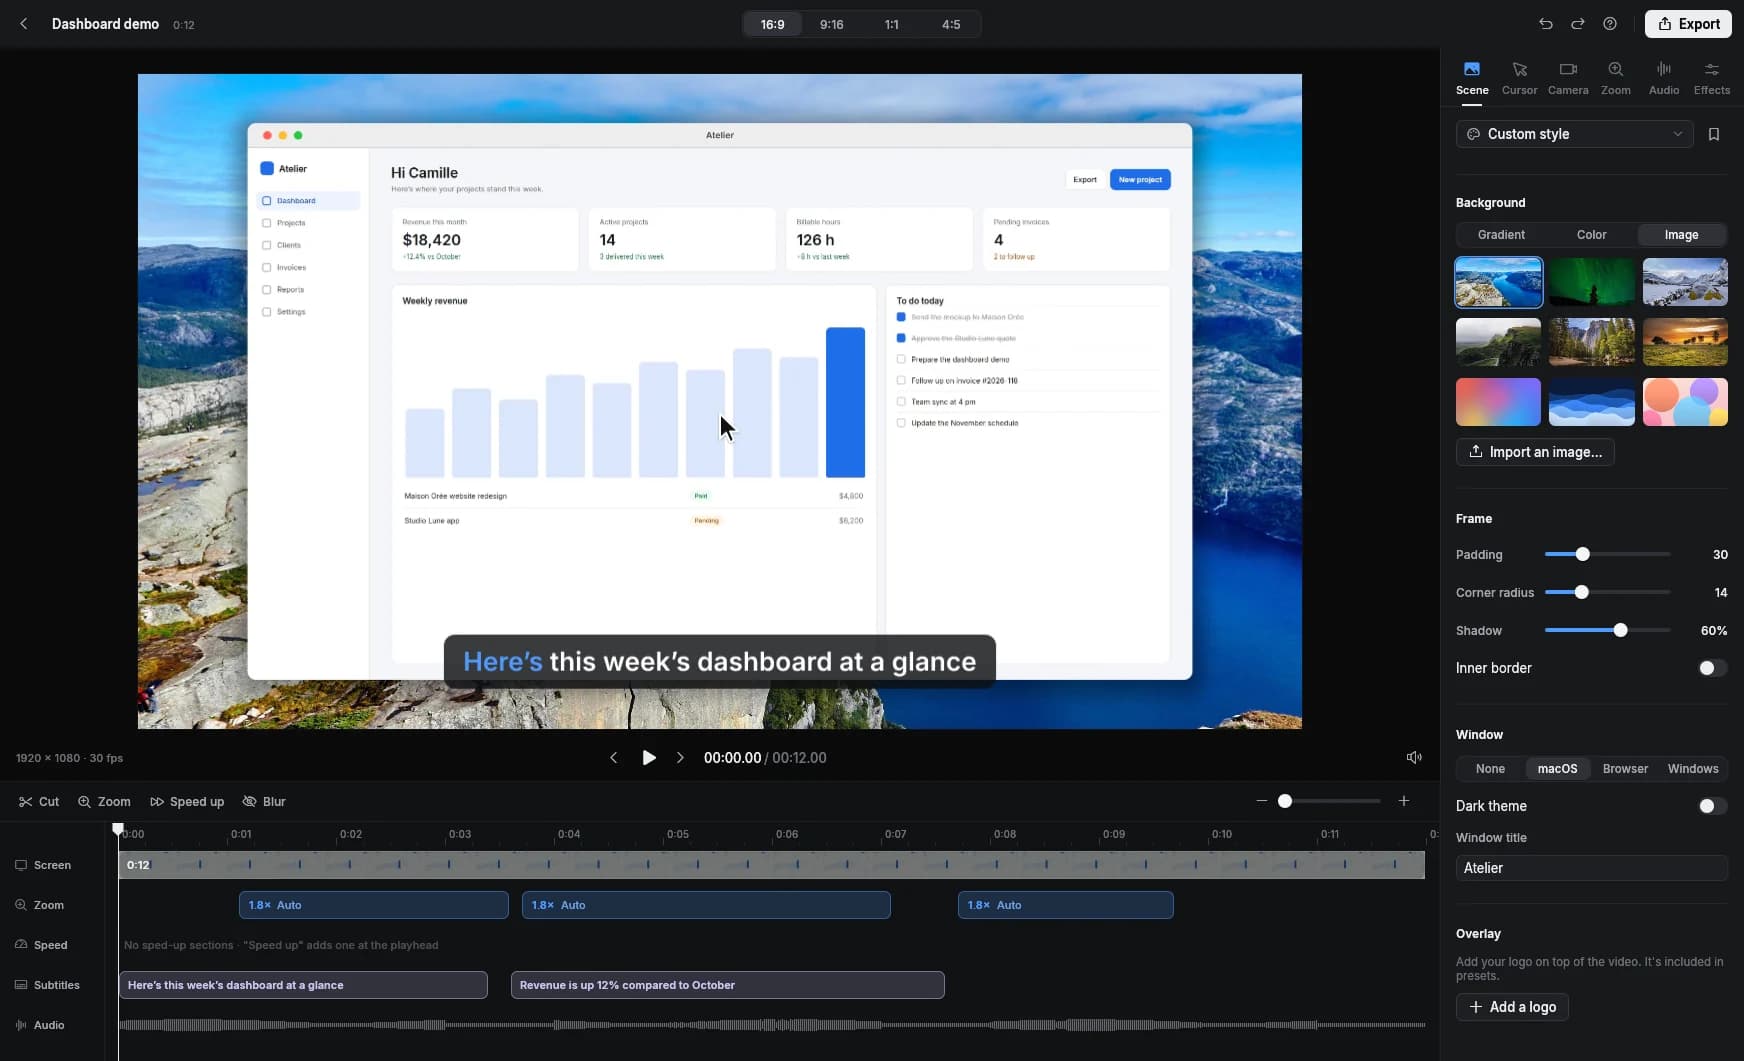
Clarcut records your mouse position, clicks and keystrokes separately from the video. That means the edit is calculated afterward, and you can tweak all of it:
- Automatic zooms on every click with smooth motion. Drag the frame, pull a corner to change the zoom level, or add a zoom with the Z key. Recalculating zooms keeps the ones you added by hand.
- A smoothed cursor (smooth or extra smooth) that hides when idle, with a ripple on every click.
- One-click silence removal at Gentle, Normal or Strong. Gentle only cuts pauses longer than one second, which is the right setting for a course where students need room to breathe.
- Background noise removal (keyboard, fan, room tone), processed on your computer.
- Speed up typing: long typing stretches play faster automatically, with the audio muted so you never get chipmunk voice.
- On-screen keyboard shortcuts, a big help in software training.
- Smart camera: your webcam bubble moves out of the cursor’s way and hides during silences.
- Saved style presets with your background, frame and logo, so every lesson looks consistent.
- Automatic captions with Clarcut Pro, transcribed on your computer and fully editable, with .srt export.
Mistakes to avoid
- Recording an hour-long session as a single video. Nobody can find the part they need.
- Reading slides word for word instead of showing the real thing in the software.
- Leaving the full 16:9 screen with no zoom. On a laptop, the text becomes microscopic.
- Cutting silences on Strong. Students need a beat to follow along with each step.
- Skipping captions. They help students who are deaf or hard of hearing, people watching with the sound off, and non-native speakers.
- Leaving personal data on screen. Blur it in the editor instead of re-recording.
Publishing and measuring
Export each lesson as an MP4, in 1080p (free, with a small watermark) or in 1440p or 4K with Clarcut Pro, then upload it to your course platform: Teachable, Thinkific, Kajabi, Podia, Canvas, Moodle or your own site all accept video files. If the platform supports caption files, upload the .srt from Clarcut Pro instead of burning captions into the picture, so students can turn them on and off. Give every lesson a clear, action-based title (“Set up a recurring invoice”).
To measure, focus on completion rate per lesson and where students drop off. In its State of Video report, based on more than 13 million videos, Wistia recommends putting the most important information in the first half of an educational video, since most viewers drop off around the halfway point. A lesson that loses half its students before the walkthrough usually has an intro that’s too long. Track recurring questions, too: each one can become a short supplemental video.
Where Clarcut falls short for courses
Clarcut is a screen recorder that edits for you, not a course platform. It doesn’t manage students, quizzes or certificates, and it doesn’t integrate with any LMS: you export an MP4 and upload it yourself.
It doesn’t remove filler words like “um,” only silences. There’s no teleprompter, and you can’t draw arrows or shapes on the video. For a heavily animated course with lots of diagrams, a full video editor is a better fit. Finally, Clarcut Plus share links are great for a bonus workshop, but not for hosting a paid course: if the subscription ends, videos are deleted after 30 days. Keep your lessons on your course platform. For those bonuses, Clarcut Plus white label puts the page on your own domain, with your logo and colors and no mention of Clarcut.
Frequently asked questions
How long should an online course video be?
Aim for 2 to 6 minutes per lesson. Guo, Kim and Rubin’s study of 6.9 million edX viewing sessions found that engagement drops sharply past roughly 6 minutes. Split longer topics into several videos.
Should I be on camera in my course videos?
It’s a good idea, at least at the start and end, since a human presence holds attention better. During the walkthrough, a small bubble is enough. Clarcut’s smart camera moves the bubble away from the cursor and hides it when you stop talking.
What’s a good free tool for recording online course videos?
Clarcut is free on Windows 10 and 11 and on Apple silicon Macs, with no time limit. All the automatic editing is included, and exports are 1080p at 30 fps with a small watermark. Clarcut Pro ($44, one-time) removes the watermark and adds captions.
Can I upload Clarcut videos to Teachable, Thinkific or Canvas?
Yes. Clarcut exports standard MP4 files you can upload to any course platform, plus an .srt caption file with Clarcut Pro. There’s no direct integration, so uploading is manual.
How do I caption my course without uploading videos to a cloud service?
Clarcut Pro transcribes on your computer, word by word. You fix any errors, pick a style, then export the captioned video or an .srt file.
How do I keep lessons up to date when the software changes?
If each lesson is short and covers one task, you only re-record the affected video. Save a style preset in Clarcut so the new version looks exactly like the rest of the course.